Showing posts with label Recipe. Show all posts

Saturday, December 13, 2014

Banana Blueberry Baked Oatmeal

I was first introduced to baked oatmeal when we lived in Amish country Pennsylvania. Mmm, good stuff. I haven't thought much about it until today...8 years later. I had a bunch of bananas that looked okay when I left for work but were way past ready when I got home. I didn't want banana bread, cookies, or smoothies. Out of NOWHERE I thought of baked oatmeal and wondered..."Can I put bananas in that?" The answer is yes! I followed (mostly) this recipe for Baked Blueberry Oatmeal from Nutmeg Nanny (sweet name!!).
Courtesy of Nutmeg Nanny
Here's the scoop:

Baked Blueberry Oatmeal


Yield: 8x8 pan
Prep Time: 15 minutes
Cook Time: 45 minutes
Total Time: 60 minutes

Ingredients:

2 cups old fashioned rolled oats
1 teaspoon baking powder
1 1/2 teaspoon ground cinnamon
1/2 teaspoon fine grain sea salt
2 cups milk
1 large egg
1 Tablespoon unsalted butter - melted (or not)
2 teaspoons vanilla paste (or extract) (definitely extract)
1/3 cup maple syrup (I used what I had left...maybe a tablespoon or so)
2 ripe bananas - cut into 1/2 slices (ummm...alternate method below)
1 1/2 cup blueberries
Source: Slightly adapted from Epicurious

Directions:

Preheat oven 375 degrees.
Butter 8x8 dish and cover bottom with banana slices. Then sprinkle 3/4 cup blueberries over top bananas and set aside. (I basically disregarded this whole section. I mixed my bananas in with my wet ingredients (see below), and saved the blueberries for the top. I know, rebel).
In medium bowl mix together oats, baking powder, cinnamon and salt. Stir to combines.
In another bowl beat together milk, egg, butter, vanilla paste and maple syrup.(Add the bananas now and make them part of the "batter")
Add oats to dish and gently pour milk mixture over oats (or pour oats in bowl, stir, then dump). Gently rap pan on the counter to make sure the milk has gone all the way through the oats. (Yeah, didn't do that either)
Sprinkle the top with blueberries and cook in oven for 35 to 45 minutes until the top is golden brown and the oatmeal is set. If desired, drizzle the top with more maple syrup. (Definitely, YES!!)

*******
I feel like I hardly followed her directions at all, but I still turned out some AMAZING baked oatmeal!! I have a feeling baked oatmeal is one of those forgiving dishes that would allow me to test all sorts of delicious, if not a bit iffy, flavors! Only time will tell!

Monday, August 5, 2013

Ravioli Casserole

Today was the first day of school. To me, it doesn't mean that much. But to mom, it means the first day back to work. Around 11:45, just before my lunch break, I realized I should have made dinner for her so she didn't have to worry about anything when she got home, at least not on day one.

So what is a person to do? I found a recipe on Pinterest for this crock pot (are there any better words than that??) casserole. I may be a little slow, but there is NO ravioli in this casserole. But then I got to thinking and I think it gets it's name from the fact that the ingredients are all IN ravioli. Regardless, it was delicious!!!

The recipe comes from Katherine in the Kitchen and is a definite keeper and new addition to my recipe stash!!

I'm also being lazy and am snagging the photo of the dish directly from her blog. Seriously, go make this!!


Ingredients:

  • 1 1/2 lbs. lean ground beef (today I used 1 lb ground turkey)
  • 1 onion, chopped
  • 1 clove garlic, minced
  • 1 (15 oz.) can tomato sauce
  • 1 can stewed tomatoes
  • 1 tsp. oregano
  • 1 tsp. Italian seasoning
  • Salt & pepper to taste (I also added in some crushed red pepper to taste)
  • 10 oz. spinach
  • 16 oz. bowtie pasta, cooked
  • 1/2 cup Parmesan cheese, shredded
  • 1 1/2 cup mozzarella, shredded

Directions:
  1. Brown ground beef (or turkey) with onion and garlic.
  2. Put in crock-pot and add sauce, tomatoes, and seasonings
  3. Cook for 6-7 hours on low.
  4. Add the last 4 ingredients during the last 30 minutes of cooking and turn crock-pot to high.
  5. Add the fresh spinach, pasta, Parmesan, and 1 cup of the mozzarella and mix.
  6. Add the last 1/2 cup of mozzarella to melt on the top.
***Back to me***
I realize now I didn't follow ALL of the directions (surprise, surprise). After the meat and sauce had cooked, I just threw EVERYTHING else in for the last 30 minutes. It would appear that this is a very forgiving dish! And did I mention that it is DELICIOUS??? Why are you still sitting here?? Go find your crock pot...STAT! 

For those of you keeping score at home, this makes 10 servings and with the substitution of the turkey comes out to 6 WWPP (7 if you use ground beef)! 

Sunday, August 4, 2013

Blueberry Muffin Tops

Here is part 2 of my Sunday afternoon baking adventure. Unlike so many of my baking adventures, this one was totally planned. So unlike me...what is happening?? :) This is another recipe from the Josi Kilpack culinary mystery series. I present "Blueberry Muffin Tops"


Ingredients:
1/2 cup shortening
1/4 cup butter
1 egg
1 cup sugar
1 teaspoon vanilla
1 1/2 teaspoons lemon zest (can use 1 teaspoon lemon juice instead)
2 tablespoons milk
2 cups all-purpose flour
1 1/2 teaspoons baking powder
1/2 teaspoon salt
1 cup fresh blueberries, or frozen blueberries (no need to thaw)

Preheat oven to 375 degrees. In a large bowl, cream the shortening, butter, egg, sugar, vanilla, lemon zest, and milk. In a separate bowl, combine dry ingredients. Add to shortening mixture until just mixed. Fold in blueberries, careful not to crush the berries. The batter might be a little crumbly.

Drop by teaspoonfuls (or 1-inch scoops) onto parchment or silicone-mat baking sheet (blueberries stick like crazy).

Bake 12 to 15 minutes or until muffin tops are golden brown. Cool on cookie sheet for two minutes before moving to a rack to cool. Makes 3 dozen.

Option glaze:
1/2 tablespoons butter
1 cup powdered sugar
2 tablespoons lemon juice

Mix all ingredients together. Drizzle over cookies while cookies are still warm.

Note: A streusel topping might taste really good too!

***Now, my notes!!
I used unsweetened vanilla almond milk in place of regular milk based on my personal preference. Also, the part that says "In a separate bowl, combine dry ingredients...", yeah, I ignore that and just put all the dry ingredients right in the bowl, but don't over mix.

When it said the batter might be a little crumbly. Um, yeah, that was NOT my problem. Mine was very smooth. Almost a cross between a muffin dough and a cookie dough...delicious (not that I know...).

On the glaze, I skipped the butter and just used the 2 tablespoons of lemon juice and a little less than a cup of powdered sugar (I think...that's what I get for not measuring!).

This recipe makes 3 dozen. Each muffin top is 2 WWPP!! Yum!!

Mom' s Lemon Tart

I have have an ever-growing collection of recipes from the culinary mystery series I love by Josi Kilpack. I've been putting off making these recipes, mostly out of fear. This is a daunting goal. But I figure that like every other goal I have set this year, I can't get anywhere near finishing if I don't take a step and start. I've made a couple over the last year or two, but I outdid myself tonight and made two recipes. The first I made was "Mom's Lemon Tart".


Crust:
1 cup all-purpose flour
1/3 cup powdered sugar
Pinch of salt
1/2 cup (1 stick) cold unsalted butter (cut into smaller pieces)

Preheat oven to 425 degrees. In a food processor or mixer, combine ingredients for crust. Pulse together until a dough starts to form in clumps. Press into tart pan, making sure to cover bottom and sides evenly. Pierce the bottom of the crust with a fork and place in freezer for 10 to 15 minutes.

Place tart pan on a cookie sheet and back until crust is a golden-brown color, approximately 12 minutes. Remove from oven and let cool.

Filling:
5 oz. cream cheese
1/2 cup granulated sugar (Breanna likes an extra 1/4 cup sugar in the filling)
3/4 cup fresh lemon juice (about 2 large lemons - DO NOT use concentrated lemon juice)
2 large eggs
Zest from one lemon (get zest from lemon before juicing)

Reduce oven temperature to 350 degrees. Mix cream cheese with electric beaters until smooth. Add sugar. Mix until well blended. Add the eggs one at a time, mixing thoroughly after each egg. Stop and scrape bowl halfway through. Add the lemon juice and zest and mix until smooth.

Pour filling into tart crust and bake on cookie sheet for 20 to 30 minutes or until filling is set. Let tart cool on wire cooling rack. Cover and refrigerate until well chilled.

Use whipped cream as an optional topping. It can be piped on in stars or served on top with each piece. For extra flavor in the whipped cream, add a teaspoon of lemon zest.

**Quick note: I didn't added the extra sugar mentioned in the filling, but if I did it again, I probably would. It was pretty tart, but oh so rich and delicious. As my father would say, "that'll make your tongue slap your brains out".

Serves 20.

As the recipe is written (without the extra 1/2 cup of sugar, a serving is only 3 PP!! Not too shabby!

Friday, July 26, 2013

Fruity Pasta Salad

Another great recipe from Josi Kilpack's culinary mystery series. This one from the book "Key Lime Pie". Out of all of the recipes, this is one that made my mouth water from the very first day I read about it...YEARS ago...and I JUST got around to making it. I made a few "adjustments" to suit my current dietary needs which I'll notate below. Here you go!


Ingredients:
2 cups mayonnaise (I used 2 cups vanilla greek yogurt)
1 teaspoon minced garlic
1/2 teaspoon celery seed
1/2 cup honey (I used 1/2 cup agave nectar)
1 teaspoon salt
1/2 teaspoon pepper
2-3 chicken breasts, diced *
1 (16-oz) package tri-colored pasta (Rotini, wacky mac, penne, etc.)
2 (15-oz) cans mandarin oranges, drained (Shawn likes fresh mangoes, for a more tropical taste) (I used fresh mango...HIGHLY recommended!!)
1/4 lb. sugar snap peas, sliced diagonally
1/2 cup chopped green onions
Chow mein noodles (I skipped these entirely, but I imagine they would be fabulous)

In a medium-sized bowl, mix the mayonnaise, minced garlic, celery seed, honey, salt, and pepper together. Cover and place in the refrigerator. Cook the chicken in a pan, then dice and place in a large bowl. While the chicken is cooking, cook the pasta, then drain and add to chicken. Add the mandarin oranges, sugar snap peas, green onions, and mayonnaise sauce (greek yogurt sauce) to the bowl. Gently mix together until everything is covered with the sauce. Refrigerate for one hour before serving. Top with chow mein noodles.
Serves 12.
*Can use canned chicken in a pinch.

If you go ahead and use the greek yogurt in place of the mayo, don't refrigerate first. I did and it soaked in to the pasta and was dry, but it was sooo good at the very beginning. That, or make extra sauce to serve on the side after refrigeration. Either way, I think you'll like this one. I know I did and without trying to sound entirely selfish, that's what it is all about. :)

Sunday, July 21, 2013

Broccoli, Ham, and Egg Bake

We had the missionaries over for dinner last night. We planned to do this a week in advance. And here it was, Saturday morning, and we STILL had no clue what we were going to fix!! Okay, that's not exactly true. We had so many options and we couldn't make a final decision! Sometime mid morning, we decided that we would have waffles for dinner (seriously, is there anything better??). I had seen a recipe for a breakfast casserole on Pinterest (here we go again...) and had been wanting to try it, but hadn't had the chance. Well, here it was and I was taking the opportunity!  Here is a link to the original recipe. I'm even being COMPLETELY lazy and using one of her pictures. Mostly because I didn't think to take one of my own, and because this is one dish that actually looked like the pictures!! Here it is:


Broccoli, Ham, and Mozzarella Baked with Eggs
(Makes 8 servings; recipe created by Kalyn)...(mine made 15 servings, but that was because it was a side to the waffles and not the main dish)

Ingredients:
4-6 cups very small broccoli flowerets, blanched about 2 minutes, then drained well (when I make this again, I will likely not blanch the broccoli first...it was just a bit too cooked by the time the eggs finished baking)
1-2 cups diced ham (1/2 -1 lb.) - I cheated and purchased pre-diced ham...it was cheaper yesterday than the alternative.
1 cup low-fat grated Mozzarella - I only used about 1/2 - 3/4 cups
1/3 cup thinly sliced green onion (optional) - I also added an additional 1/3 cup onion - diced.
8-10 eggs, well beaten - I used 8
Spike Seasoning (or other all-purpose seasoning blend) to taste - I used straight S&P

Instructions:

Heat oven to 375F. Spray a 9"x12" casserole dish with non-stick spray. (The dish can be slightly smaller too, especially if you use the smaller amounts of ingredients.)

Bring a medium-sized pot of water to a boil and cook the broccoli just 2 minutes; then pour into a colander placed in the sink and let it drain well. Dice the ham while the broccoli drains.

Layer broccoli, ham, Mozzarella, and green onions (if using) in casserole dish. Season with Spike Seasoning and fresh-ground black pepper and pour beaten egg over. Use a fork to "stir" the mixture just until all the ingredients are coated with egg. (It might look like there is not enough egg, but carry on!)

Bake 35 - 45 minutes, or until all the mixture is set and the top is starting to lightly brown. (If you use the higher amount of eggs, it will take longer baking time, but start to check after about 30 minutes.) Serve hot, with low-fat sour cream if desired. This can be kept in the fridge for at least a week and reheated in the microwave.

-----

For anyone keeping score at home, based on my 15 piece serving per recipe, this comes out to 2 PointsPlus!! Phenomenal!!

Friday, July 19, 2013

Banana Oatmeal Bars

Another slightly adventursome recipe! One of my coworkers found this one and knew that it would be something I would like to try (they know me too well).  This one is crazy easy, very dense and moist, and all around healthy!! Here's what you do...
 
3 mashed bananas
1/3 cup applesauce
2 cups oats
1/2 raisins
1/4 cup almond milk
1 tsp vanilla
1 tsp cinnamon

Mix all ingredients together. Pour into prepared pan (I sprayed mine with olive oil). Bake at 350 for 15 - 20 minutes.

Everytime I make a recipe that starts with "banana" as it's first ingredient, I hear immediately that it needs an egg, or baking soda, or SOMETHING to make it a little less dense. At first bite, I thought the same thing too. But on day 2, after it had time to sit, the flavors blended together better and, even though it was dense, I decided that I would change a thing. I used a 5 x 8" pan (do they even make a pan with those dimensions?? It was smallish and rectangular...good luck) and it made 12 servings which came out to 3 PointsPlus per square...not bad at all, if I do say so myself. :)

And when I make these again, I feel like I want to spice it up a bit...and for some bizarre reason I'm thinking chipotle pepper powder is just what I'm looking for. We'll see...

Tuesday, May 7, 2013

Key Lime Pie Popcorn

We had Ward Family Home Evening (basically everyone from our church congregation (the ward) gets together and has a lesson (Family Home Evening typically happens in families on Monday night) last night which always starts with a potluck dinner. I only had 30 minutes from the time I walked in the door until we left, so I had to make something quick.
 
I'm really loving popcorn desserts lately. Okay, so I just really love popcorn lately. The things I put on it for other people I don't typically love which is why it works. :)
 
I searched Pinterest and came across this recipe for Key Lime Pie Popcorn on the blog, Inside BruCrew Life (may be a new favorite blog!!). Seriously, she has so many delicious looking recipes, I just want to try them all.

 
Here is her recipe:
 
 
Ingredients
 
8 cups popped popcorn
2 cups miniature marshmallows
2 cups graham cracker chunks
10 oz. white melting chocolate (CandiQuik)
1 packet Duncan Hines Frosting Creation Key Lime Pie
2 oz. chocolate melting chocolate (CandiQuik)
 
Instructions

1. In a large mixing bowl toss the popcorn, marshmallows, and graham cracker chunks. Melt the white chocolate according to the directions. Stir in the flavor packet. Pour over the popcorn and toss until coated.
2. Spread the popcorn on a large baking sheet that has been covered with parchment paper. Refrigerate for at least 5 minutes. Remove and break apart the popcorn into chunks. Drizzle with the melted chocolate topping. Let set again. Store in a sealed container for 3-5 days.
Makes about 10 cups.

Notes

If you can't find the Key Lime flavor, feel free to substitute with any of the Duncan Hines flavors.


Here's how it actually went down in my kitchen.
  • Our store didn't have the Key Lime flavor (you're in Waycross, honey), and I was a bit frazzled when I went shopping, so changing flavors wasn't really an option. So I purchased lime flavored Jell-O mix instead. DON'T do that! The flavor was okay, but it stayed gritty. I tried to fix it but ended up with a sugary brick of green-ness. FAIL. It was at this point that I decided I would have plain white chocolate.
  • Instead of standard mini marshmallows, I used key lime marshmallows (hello, I think it was a sign!!). I cut them in half since they are about double the size of a mini marshmallow.
  • Graham crackers...yum! Graham cracker chunks...yum, but I'm way too lazy for that! I found Lil Grahams by Honey Maid...bite size little squares that worked perfectly for this dish. (As a side note, 29 pieces are a serving and they have a WW PointsPlus value of 3...YAY!!)
  • 10 oz. of white melting chocolate - here's the deal, I DO NOT like white chocolate! Thinking of coating 8 cups of popcorn with 10 oz. of the stuff makes me gag. I used somewhere between 6 and 8 ounces. Also, instead of coating it, I just drizzled it over the top. That way I could still pick out a few pieces without any "contamination". And, I say somewhere between 6 to 8 ounces because I melted 8 but had some left over.
  • 2 oz. chocolate melting chocolate - yeah, I just skipped this entirely because of my white chocolate drizzle.

 
Even though I'm not a fan of the white chocolate, I HIGHLY recommend this recipe! I can't wait to try another recipe from Inside BruCrew Life. Go check it out!

Saturday, April 27, 2013

Flourless Chocolate Chip Chickpea Blondies with Sea Salt

I've gotten back in the kitchen again and have been trying all sorts of..."different", healthy recipes. Well, I was craving something delicious for dessert last night and came across Ambitious Kitchen and her recipe for Flourless Chocolate Chip Chickpea Blondies with Sea Salt. I was a bit, uh, terrified! Chickpeas? Dessert? Really? I got up my courage, purchased a can of chickpeas, broke out the food processor and got to work.
The result?? A surprisingly delicious dessert. Here are a few thoughts:
Pros: Great peanut butter flavor (a favorite!!). Very moist. Great sweet and salty balance.
Cons: The chickpeas were a bit grainy and left just a slight aftertaste...but that's it! 
These haven't quite worked there way into the "new favorite dessert" category, but they were quite good. If you're looking for a healthy dessert, just a little out of the ordinary, this is the dessert for you!
Here is the recipe!
Ingredients
  • Cooking Spray
  • 1 can (15 oz) chickpeas, rinsed and drained
  • 1/2 cup all natural almond butter or peanut butter
  • 1/3 cup pure maple syrup or agave nectar (you can also use honey if you’re not vegan)
  • 2 teaspoons vanilla
  • 1/2 tsp salt
  • 1/4 teaspoon baking powder
  • 1/4 teaspoon baking soda
  • 1/3 cup vegan (or regular) chocolate chips plus 2 tablespoons
  • sea salt, for sprinkling
Instructions
  1. Preheat oven to 350 degrees F and spray 8×8 inch pan with nonstick cooking spray.
  2. In a food processor, add all ingredients except chocolate chips and process until batter is smooth. Fold in 1/3 cup of chocolate chips, I like to use dark chocolate because it has less sugar but it’s up to you. Note: Batter will be thick and super delicious, so you could actually just eat it on it’s own!
  3. Spread batter evenly in prepared pan then sprinkle 2 tablespoons of chocolate chips on top. (The batter may stick to your spatula, so I like to spray my spatula with nonstick cooking spray first.) Bake for 20-25 minutes or until toothpick comes out clean and edges are a tiny bit brown. The batter may look underdone, but you don’t want them to dry out!
  4. Cool pan for 20 minutes on wire rack. Sprinkle with sea salt then cut into squares. Makes 16 blondies.

**WW PointsPlus: 3 per serving.**


Friday, March 29, 2013

BBQ Jalapeno Popper Grilled Cheese Sandwich

Several weeks ago my brother and sister in law and the kids came to spend the day with us. RJ suggested that we make dinner that night for everyone. We had both seen on Pinterest people making Jalapeno Popper Sandwiches and they looked SOOOO good! So that's exactly what we did!
 
A couple of weeks later, I was craving the deliciousness that is this sandwich! We also had leftover pulled pork BBQ (seriously, my dad make the BEST BBQ ever!!) and I wanted that too, but I couldn't decide, so I came to the ONLY logical conclusion...BOTH!
 
I didn't follow the original recipe for the Jalapeno Popper portion of the sandwich, but I will let you in on what I did for this one!
 
Take two slices of your favorite bread, or a bun, or whatever medium you prefer to use. I am pretty sure I used an Orowheat Thin Sliced Bun (I think I just made that name up!), toasted. I put 1/2 tablespoon of cream cheese on each slice of bun. I then added two jalapenos that had been cooked until very soft (yes, they were also cleaned out to remove some of the spice), one on each side. Then I put in the BBQ. Put both slices together and YUMM-O! I'll definitely be doing this one again!
 

Thursday, March 28, 2013

Cauliflower Crust Pizza

 
I've been trying a lot of new recipes lately - healthy recipes - and have found some REALLY delicious ones. My parents have been troopers about trying some of these creations. And quite frankly, I've been nervous about some of them.
 
This one in particular caused a lot of angst. I am NOT a fan of cauliflower. I don't like it's color, I don't like it's texture, and I most certainly do NOT like it's flavor! So why, you may ask, did I feel like I even wanted to try this? In all honesty...I have NO idea! But I'm so glad I did!
 
Here's the skinny on this! This is Paula Deen's recipe (surprise!! NO BUTTER!!):
 
Ingredients:

Non-stick spray
2 ½ cups grated cauliflower (about ½ a large head)
1 large egg, lightly beaten
1 cup shredded part skim mozzarella
2 tablespoons grated Parmesan cheese
Kosher salt and freshly ground black pepper
1/4 cup homemade or store bought tomato sauce
1/2 cup shredded part skim mozzarella cheese
1 cup grape tomatoes, sliced in half
2 cloves garlic, sliced
¼ teaspoon crushed red pepper flakes
¼ cup basil leaves, for garnish
  
Directions:

Heat oven to 425 degrees. Line a rimmed baking sheet with parchment paper.
Grate the cauliflower using a box grater until you have 2 cups of cauliflower crumbles. Place in a large bowl and microwave for 7-8 minutes, or until soften. Remove and let cool. Mix in the egg, mozzarella, Parmesan cheese, and salt and pepper. Once combined, pat into a 10-inch round on the prepared pizza pan. Spray lightly with non-stick spray and bake for 10-15 minutes, or until golden.
Top the pizza with the sauce, mozzarella, cherry tomatoes, garlic, and red pepper flakes. Bake in the oven until melted and bubbly, another 10 minutes. Top with basil before serving.

As you'll see I didn't follow her recipe for toppings exactly, but it was just as good, if not better! I also recently discovered the wonder that is turkey pepperoni! Delicious!! I put that on this pizza as well! If you're feeling a little adventurous and looking for a variation to standard pizza, give this one a whirl.


Sunday, May 20, 2012

Back in the kitchen - Creamy Tomatillo Dressing

Since I moved, I've missed spending time in the kitchen. Is that weird? Perhaps, but it's me, so there. :)

There's this fabulous little Mexican restaurant chain out west called Cafe Rio (just saying those two words make my mouth water). I didn't go there terribly often while I lived there, but when I did I always ordered the same thing...the Sweet Pork Barbacoa Salad. The pork on this salad is absolutely amazing, but what really addicts me to this salad is the dressing.

If you know me, you know I really don't like salad dressings, especially not creamy-based dressings. Personally, there aren't too many things that gross me out more, but this salad dressing makes me reevaluate my position entirely. Each time I went to the restaurant, I declined the offer for the dressing for the entire first year I lived in Utah, but at some point my resolve weakened and I tried this creamy, green and slightly spicy dressing, and my life hasn't been the same since.

Okay, in all seriousness though, the Creamy Tomatillo Dressing is life-changing. I decided a few days ago that I was really craving this flavor. So, I did what any smart cook would do - I jumped online and found this copy-cat recipe.


1 packet of buttermilk ranch dressing
1 Cup mayo
1 Cup buttermilk (the smallest carton is perfect)
1 bunch of cilantro
2 tomatillos husked (I didn't even know what these were until this dressing haha)
1 jalapeno (take the rib and seeds out)
Garlic powder (just a few shakes)
Juice from 1 lime

First, put the mayo, dressing mix, buttermilk, and garlic in a blender 
and mix until blended all together.

Cut up all the greens - tomatillos, jalapeno, cilantro and juice of the lime.
Add all the green ingredients 
and blend until mixed together and creamy
Then you will let it chill in the fridge for at least 30 min

If you have time to make it, hunt down the recipe for their pork (I haven't had time yet, but I will post it as soon as I do). If you want the full experience - start with a tortilla in a bowl or on a plate. Put on your pork and add beans (I recommend black beans). Then top with your favorite greens (I'm a romaine-type girl), pico de gallo, cilantro and corn tortilla strips (you can add anything else you like). And now the moment we've ALL been waiting for...add the dressing!! And then if you want - add a little more! You won't regret it (and if you do, don't call me.) :)

Monday, February 6, 2012

Mango Corn Bread


So, one of the items on my bucket list is to make all of the recipes from one of my favorite murder mystery series. Sunday was the first in what will prove to be a long process.
This is Mango Cornbread. The picture isn’t much to look at, but the flavor was pretty good. I also imagine substituting pineapple for the mango.
It turned out being much more dense that I like my cornbread…almost like a heavy cake. And it needed a bit more salt, though the sugar on top helped diffuse some of that dense flavor (is there such a thing as dense flavor??).  Actually, now that I think about it, Lori and I were working on this together and I’m wondering if we forgot to add some ingredients (thinking the other had already done it)…perhaps the salt and baking powder. Hmm, must pay more attention.

Here is the recipe:

2 cups flour
2 cups cornmeal
2 tablespoons baking powder
1 teaspoon salt
½ teaspoon cinnamon
¼ teaspoon nutmeg
1 cup butter
½ cup sugar
4 eggs
2 cups milk
1 mango, chopped
1 tablespoon sugar

Preheat oven to 350 degrees. Combine dry ingredients and set aside. Cream butter and sugar. Add eggs and milk. Add in dry ingredients, stir until just mixed. Add mango. Stir to combine. Pour batter into a greased 9x13-inch pan. Bake 35 to 45 minutes or until toothpick inserted into the center comes out clean. When bread is done baking, sprinkle top with sugar. Serve with softened butter.

Makes 12 servings.

Note: Can use a cornbread mix. Follow package instructions to prepare batter, then add cinnamon, nutmeg and mango. Mix according to recipe.

**I checked with Lori...we did forget the salt and baking soda. While this doesn't give me much confidence in following recipes (at least not together)...it does give me confidence that this will turn out SOOOO much better next time!**


Sunday, January 29, 2012

Buffalo Chicken Dip

We had a dip night on Thursday with our ward. I searched high and low for a really great recipe...you know the kind that is really easy, tastes incredible, and leaves the bowl completely empty. Well, I found it! Enjoy!


Frank's RedHot Buffalo Chicken Dip

Ingredients:
8 oz. pkg. cream cheese, softened
1/2 cup blue cheese or ranch salad dressing
1/2 cup Frank's RedHot Original Cayenne Pepper Sauce or Frank's RedHot Buffalo Wing Sauce (I used the buffalo wind sauce)
1/2 cup crumbled blue cheese or shredded mozzarella cheese
2 cans (12.5 oz each) Swanson White Premium Chunk Chicken Breast in water, drained

Directions:
Heat oven to 350 degrees. Place cream cheese into deep baking dish. Stir until smooth.
Mix in salad dressing, Frank's RedHot Sauce and cheese. Sitr in chicken.
Bake 20 minutes or until mixture is heated through; stir. Garnish as desired. Serve with crackers or vegetables.

*Notes*
1. Mix the cream cheese, salad dressing and hot sauce in a bowl, then add remaining ingredients and the pour entire mixture into baking dish. One extra bowl equals a LOT less mess...trust me on this one!
2. You will maintain the title of "Dip Hero" as long as you bring this dip! You may not want to let it slip just how easy it is. Wait a minute...what did I just do???

Sunday, January 8, 2012

Cheese Puffs

I love making cream puffs but decided for New Year's Eve that I wanted to make cheese puffs. They are so easy and turned out great!
Here'e the recipe:
1 stick butter
1 cup water
1 cup flour
4 eggs
1/4 teaspoon salt
Cheese (I used Swiss, Jack, and Brie - about 3/4 cup total)

In a saucepan, combine butter and water until boiling. Add flour and stir until dough pulls away from sides and forms a ball. Remove from heat and add eggs, one at a time, stirring completely before each new addition. Add cheese and stir until combined. Using either a scoop or piping bag, place portions of cheese puff dough on a lined baking sheet. Bake at 425 for 15-20 minutes. Reduce heat to 350 for about 10-15 minutes or until puffs are done. The centers may seem a little doughy because of the cheese but if it has been baked enough, it will dry out as it cools.
Note - you can use any combination of cheeses. You may want to use more or less, depending on your desired taste. I also served mine with blackberry jam. It paired exceptionally well with the flavor of the brie.

Monday, September 19, 2011

Obedience and the Cream Puff

Well, it was actually an entire batch of cream puffs. I’ve been making cream puffs for years. They always turn out good, if I do say so myself. I would even consider myself fairly satisfied with the end result, though I always thought it could be better.

Several weekends ago, Lori had her last day of work in the bakery and she wanted to take a treat in to share with everyone (and when you work in a bakery, what else do you take but baked goods??). She decided that she wanted to take cream puffs, so we got to work. I was determined that since these were not for my own wants, I wanted them to be perfect. So, I took out the recipe and followed it exactly! None of this “well, it looks like it might be done”, or “its close enough”. I wasn’t striving for close, I was striving for perfection!

The recipe says to bring the butter and water to a boil. Once this happens, stir in the flour until it is incorporated and starts to form a ball. You then add the eggs, one at a time, mixing each egg in completely before adding the next one. This is generally where I mess up. I usually have help that is so helpful, I haven’t actually mixed the egg in entirely before the next is dropped in. I don’t know if this is really key, but we did it this time and worked so well.

Then you scoop them out and bake them. The directions said to bake until golden brown and crispy. I always made it to the golden brown stage but was afraid of burning them that I never really gave them the opportunity to get the right amount of crunchiness. When I made them this time, I checked them at the appointed time and then added 5 – 10 minutes, checking frequently so they didn’t burn. When I brought them out, they didn’t fall like they have in the past. They were cooked enough that they kept their shape!! They were amazing to eat plain while they were still warm…just saying.

We made the pastry cream. Usually I just use a standard pudding mix…one box mix, two cups milk. When we went to Georgia in June, I decided to mix it up a little bit. With a little guidance from a happenstance website, I added a cup of cream and a cup of milk (I’ve made it since then and have done all cream…very good, but very rich and completely unnecessary). It makes it set up thicker and gives it an amazing taste. However, I put that good cream in compacted, soft pastry puffs and it was very disappointing. This time we had it right. Amazing puffs + amazing pastry cream = amazing cream puff!!

Now, if you are a chocolate addict like me, you must have chocolate on top of the cream puff. The recipe for my chocolate glaze/frosting is my favorite. It was given to me by a friend in college and I use it any chance I get. I have always wanted it to be thicker and better than I had made, but I had never been able to get it to work. This time, we did something amazing (new favorite word for this post…sorry!). We followed the recipe…again! It says to combine the first few ingredients in a pan until it boils for a minute. I have little patience for boiling things. Lori diagnosed this problem when, after only 20 seconds, I asked if I could move one. She looked at me with a look only a sister could get away with…you know, the one that says “you’re a moron”. I continued counting to 60 (1 minute) and started getting worried when the mixture started separating in the pan. I always thought separation in food prep was a bad thing. In this case, it was the best thing that could have happened! Thick, rich, fudging frosting/glaze (honestly, it was too thick to be considered a glaze, but it was perfect on the cream puffs).

I learned through this endeavor that obedience is fine. I followed the recipes before, I did what they said. This time, however, I followed the recipe with exact obedience. In this moment, I wondered what things in my life I was being obedient to, but could be exercising exact obedience. I’ve decided that if it’s something worth doing right, whether in the kitchen, at work, or anywhere else, I am going to be doing it with exactness.

Saturday, October 2, 2010

Carmel Apple Cinnamon Rolls

A couple of weeks ago, our ward went to our bishop's house to pick apples and other fruits. He let us all take what we wanted home with us. I knew, almost instantly, that I wanted to do something "different" with them. I decided to make Carmel Apple Cinnamon Rolls. Make any sweet dough recipe - I just use a basic roll dough recipe. It's sweet without being too sweet.
While the dough is rising, you will need to do two things: first, core, peel and slice your apples; second, make a carmel sauce. Apples: I used two for this, but next time I would probably double that. I sauteed them in a sauce pan with a little bit of butter, just until they were becoming tender. Carmel sauce: I have no idea how much of anything I used, but I used a little butter, some brown sugar, and a bit of cream. Cook until the sugar is dissolved. (If I were being the slightest bit technical, my guess would be that I cooked my to soft ball stage, but I didn't actually check...oops).
After the dough has had a chance to rise (doubled in size), roll it out onto a lightly floured surface. Proceed as you normally would if you were making regular cinnamon rolls. Before you start to roll the dough, spread the apples over the dough. Then begin rolling. On The Pioneer Woman's website, she suggested rolling the dough toward yourself - a great tip!
Before rolling

Carmel sauce in the pan, ready and waiting.

Place rolls in pan. Leave enough space for them to rise.

See how well it raised!

Piping hot, just out of the oven.

Just turn the baking pan over onto a larger plate/tray to dump the rolls out. This lets the carmel sauce run all over everything.
The next time I do this I think I would save the carmel sauce for the end and drizzle it over the top. Also, I would add less brown sugar at the beginning since the sauce is rather sweet.

Thursday, September 16, 2010

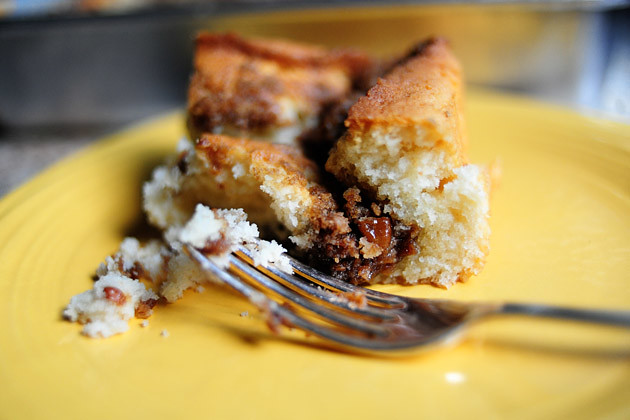
Coffee Cake

For the past several MONTHS, I have been craving a good coffee cake. I kept researching, trying to find the 'best' coffee cake recipe. After a lot of searching, I came across The Pioneer Woman's recipe "The Best Coffee Cake Ever". Not only was I intrigued by the title (because, let's face it, that's what I was looking for), but the recipe itself sounded like it would produce an AMAZING product.
About 3 weeks ago, I decided I would make it for Treat Day at work when it was my turn. This coffee cake, no lie, is the Best Coffee Cake EVER! Loved it. Because I had to leave my house by 7:15, I had a lot of the ingredients combined and ready to go so I could literally roll out of bed, throw it together, and then get ready for work. I also made this again last weekend for a girls brunch. 2 times in 3 weeks - you know it has to be good.
So, here's the recipe. You can also read all of PW's comments here.


Ingredients


■FOR THE CAKE:
■1-½ stick Butter, Softened
■2 cups Scant Sugar
■3 cups Flour, Sifted
■4 teaspoons Baking Powder
■1 teaspoon Salt
■1-¼ cup Whole Milk
■3 whole Egg Whites, Beaten Until Stiff
____
■FOR THE TOPPING:
■1-½ stick Butter, Softened
■¾ cups Flour
■1-½ cup Brown Sugar
■2 Tablespoons Cinnamon
■1-½ cup Pecans, Chopped

Preparation Instructions
Preheat oven to 350 degrees. Sift together flour, baking powder, and salt. Beat egg whites and set aside.

Cream butter* and sugar. Add flour mixture and milk alternately until combined. Don’t overbeat. Fold in beaten egg whites with a rubber spatula. Spread in a well-greased 9 x 13 (or LARGER!) baking pan. A cake pan with higher sides would be best.

In a separate bowl, combine topping ingredients with a pastry cutter until crumbly**. Sprinkle all over the top.
Bake for 40 to 45 minutes, or until no longer jiggly. Serve warm—delicious!

*Leave the butter out overnight so it is room temp/softened to work with first thing.*
**I made the topping the night before and then placed it back in the refrigerator overnight. The next morning, I loosened up the combined mixture and topped the batter with it.**
*When I made this the second time, I forgot to leave my butter out to soften overnight so my topping didn't mix together as well, but it still tasted amazing. Soft butter is the key*

Saturday, October 18, 2008

Best Cake EVER!!

CIn case you ever want to have a taste of THE best cake ever, here it is:
1 box chocolate cake mix (mix ingredients as directed)
1 box pumpkin spice Jell-o brand pudding mix - add to prepare cake batter.
Blend until smooth. Bake as directed.
SOOOOO yummy!
Tonight instead of using any kind of frosting, we used chocolate mousse (1 - 4 oz box Baker's German chocolate and 1 pint heavy whipping cream). This was A-MAZ-ING!
I will sleep happy tonight!